How to Clean Diatomite Material: A Comprehensive Guide
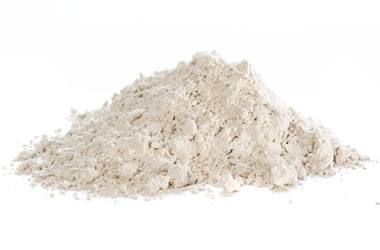
Diatomite, also known as diatomaceous earth (DE), is a naturally occurring, soft, siliceous sedimentary rock that is easily crumbled into a fine white to off-white powder. It has a wide range of applications, from filtration and absorption to use as a mild abrasive. Because of its porous nature, diatomite material can easily become soiled or stained, making regular cleaning essential to maintain its functionality and appearance. This comprehensive guide will walk you through the best methods for cleaning diatomite material, ensuring its longevity and continued effectiveness.
Understanding Diatomite Material
Before diving into the cleaning process, it’s important to understand the unique properties of diatomite. This material is composed of fossilized diatoms, a type of hard-shelled algae. Its porous structure gives it exceptional absorbent qualities, making it ideal for products like bath mats, coasters, and soil amendments. However, this same porosity also means it can easily trap dirt, oils, and liquids, leading to stains and reduced performance. Therefore, knowing how to properly clean diatomite material is crucial.
Why Regular Cleaning is Essential
Regular cleaning of diatomite material isn’t just about aesthetics; it’s also about maintaining its functionality. Over time, accumulated dirt and grime can clog the pores, reducing its absorbency and effectiveness. For example, a diatomite bath mat that isn’t cleaned regularly may lose its ability to quickly absorb water, leading to slippery surfaces. Similarly, diatomite filters can become less efficient if they’re not properly maintained. By incorporating a cleaning routine, you can extend the lifespan of your diatomite products and ensure they continue to perform as intended. Proper maintenance of diatomite material is very important to get the most out of its unique properties.
Essential Cleaning Supplies
Gathering the right supplies will make the cleaning process more efficient and effective. Here’s a list of essentials:
- Soft-bristled brush (e.g., a toothbrush or nail brush)
- Mild dish soap or a specialized diatomite cleaner
- Clean water
- Microfiber cloths
- Fine-grit sandpaper (optional, for stubborn stains)
- Baking soda (optional, for odor removal)
Step-by-Step Cleaning Guide
Initial Assessment
Before you begin, assess the condition of the diatomite material. Identify any stains, discoloration, or areas with accumulated dirt. This will help you determine the best cleaning approach. Note the severity of the staining and any specific problem areas.
Gentle Surface Cleaning
For light cleaning, start by gently brushing the surface with a soft-bristled brush to remove loose dirt and debris. This is particularly important for diatomite bath mats or coasters that may have accumulated dust or crumbs. Use a circular motion to ensure you cover the entire surface. Avoid using excessive pressure, as this could damage the delicate structure of the diatomite material.
Washing with Soap and Water
Next, prepare a solution of mild dish soap and warm water. Dip a microfiber cloth into the soapy water, wring out the excess, and gently wipe the surface of the diatomite. Avoid soaking the material, as excessive water can weaken its structure. Focus on areas with visible stains or discoloration. After wiping, rinse the cloth with clean water and wipe the diatomite again to remove any soap residue. Make sure no soap residue remains on the diatomite material.
Addressing Stubborn Stains
If you encounter stubborn stains that won’t come off with soap and water, you can try using fine-grit sandpaper. Gently sand the stained area in a circular motion, being careful not to remove too much material. This method is best used sparingly, as excessive sanding can alter the texture and appearance of the diatomite. After sanding, wipe the area with a damp cloth to remove any sanding dust.
Deodorizing Diatomite
If your diatomite material has developed an odor, baking soda can be a helpful solution. Sprinkle a thin layer of baking soda over the surface and let it sit for several hours, or even overnight. The baking soda will absorb any odors. Afterward, vacuum or brush off the baking soda. This method is particularly useful for diatomite bath mats that may have absorbed moisture and developed a musty smell.
Drying the Diatomite
Proper drying is crucial to prevent the growth of mold and mildew. After cleaning, allow the diatomite material to air dry completely. Place it in a well-ventilated area, away from direct sunlight or heat. Direct sunlight can cause the diatomite to crack or warp. Ensure that all sides of the diatomite material are exposed to air for even drying. Depending on the humidity, this process may take several hours or even a full day. You can also use a fan to speed up the drying process.
Specific Cleaning Tips for Different Diatomite Products
Diatomite Bath Mats
Diatomite bath mats are prone to absorbing moisture and developing stains from soap scum and foot traffic. Clean them regularly using the methods described above. Pay special attention to areas with visible stains or discoloration. Consider using a specialized diatomite cleaner for bath mats to help remove stubborn stains and odors. [See also: Best Bath Mat Cleaning Solutions] Ensure the bath mat is completely dry before placing it back in the bathroom to prevent mold and mildew growth.
Diatomite Coasters
Diatomite coasters can easily become stained by spills from drinks. Wipe up spills immediately to prevent them from setting in. For regular cleaning, use a damp cloth with mild dish soap. If you encounter stubborn stains, try using a paste of baking soda and water. Apply the paste to the stain, let it sit for a few minutes, and then gently scrub with a soft-bristled brush. Rinse thoroughly and allow the coaster to air dry.
Diatomite Filters
Diatomite filters, often used in swimming pools and industrial applications, require more specialized cleaning. Backwashing is a common method to remove accumulated debris. Follow the manufacturer’s instructions for backwashing your specific filter model. In addition to backwashing, you may need to periodically disassemble the filter and clean the individual components with a brush and water. [See also: Diatomite Filter Maintenance Guide] Ensure all components are thoroughly rinsed and dried before reassembling the filter.
Preventative Measures to Keep Diatomite Clean
Prevention is always better than cure. Here are some tips to help keep your diatomite material clean and prevent stains:
- Wipe up spills immediately to prevent them from setting in.
- Avoid placing diatomite products in areas with excessive moisture or humidity.
- Use a protective mat or coaster under items that may spill or leak.
- Regularly dust or vacuum diatomite surfaces to remove loose dirt and debris.
- Consider using a sealant designed for porous materials to protect the diatomite from stains.
Troubleshooting Common Issues
Mold and Mildew Growth
If you notice mold or mildew growing on your diatomite material, it’s important to address it promptly. Mix a solution of equal parts water and white vinegar and apply it to the affected area. Let it sit for a few minutes, then scrub with a soft-bristled brush. Rinse thoroughly and allow the diatomite to air dry completely. [See also: Mold Removal Tips] To prevent future growth, ensure the diatomite is kept in a well-ventilated area and is allowed to dry completely after each use.
Cracking or Warping
Diatomite can crack or warp if exposed to extreme temperatures or direct sunlight. Avoid placing diatomite products near heaters or in direct sunlight. If you notice any cracks or warping, it may be necessary to replace the item. To prevent further damage, handle diatomite products with care and avoid dropping them or subjecting them to excessive pressure.
Reduced Absorbency
If your diatomite material is losing its absorbency, it may be due to clogged pores. Try cleaning the material using the methods described above. If the absorbency doesn’t improve, you may need to replace the item. Consider purchasing a higher-quality diatomite product that is more resistant to clogging.
Conclusion
Cleaning diatomite material doesn’t have to be a daunting task. By following these simple steps and incorporating a regular cleaning routine, you can keep your diatomite products looking and functioning their best. Remember to assess the condition of the diatomite, use gentle cleaning methods, and allow it to dry completely after each cleaning. With proper care and maintenance, your diatomite material will continue to provide its unique benefits for years to come.
