Understanding the 12 Gauge Slug Trajectory Chart: A Comprehensive Guide
For hunters, competitive shooters, and ballistics enthusiasts, understanding the 12 gauge slug trajectory is crucial for accuracy and ethical shot placement. A 12 gauge slug trajectory chart provides valuable data on how a slug’s path changes over distance, accounting for factors like gravity, air resistance, and initial velocity. This guide aims to break down the complexities of these charts, offering practical insights for improving your shooting proficiency.
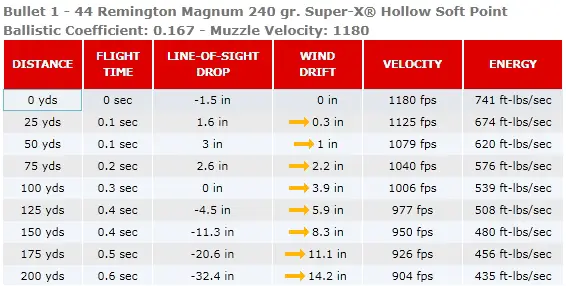
The 12 gauge slug trajectory chart is essentially a visual or tabular representation of the path a 12 gauge slug takes from the moment it leaves the barrel until it impacts the target. It typically includes information about the slug’s drop (the vertical distance it falls due to gravity), wind drift (how much the slug is pushed sideways by the wind), and remaining velocity and energy at various distances. By studying a 12 gauge slug trajectory chart, shooters can make informed adjustments to their aim and improve their chances of hitting the target accurately.
What Factors Influence 12 Gauge Slug Trajectory?
Several factors play a significant role in determining the trajectory of a 12 gauge slug. Understanding these factors is essential for interpreting and effectively using a 12 gauge slug trajectory chart:
- Slug Weight and Design: Heavier slugs and those with aerodynamic designs (like saboted slugs) tend to retain velocity better and experience less drop.
- Initial Velocity: The speed at which the slug leaves the barrel directly impacts its trajectory. Higher initial velocities generally result in flatter trajectories.
- Ballistic Coefficient (BC): This is a measure of how well a slug overcomes air resistance. Higher BC values indicate better aerodynamic efficiency.
- Sight Height: The distance between the center of the scope or sights and the center of the bore affects the point of impact at different ranges.
- Environmental Conditions: Factors such as air temperature, air pressure, and wind speed can all influence the slug’s trajectory.
Reading a 12 Gauge Slug Trajectory Chart
A typical 12 gauge slug trajectory chart will present data in a table format, with distances listed in increments (e.g., 25 yards, 50 yards, 75 yards, 100 yards). For each distance, the chart will usually provide the following information:
- Drop: The amount the slug has dropped below the line of sight, usually measured in inches.
- Velocity: The slug’s velocity at that distance, typically measured in feet per second (fps).
- Energy: The slug’s kinetic energy at that distance, usually measured in foot-pounds (ft-lbs).
- Wind Drift: The amount the slug will drift sideways due to a crosswind (usually a 10 mph wind is used as the standard), measured in inches.
To effectively use a 12 gauge slug trajectory chart, you need to understand how to interpret this data. For example, if the chart indicates a drop of -5 inches at 100 yards, you would need to aim 5 inches high to compensate for the drop and hit the target at that distance. Similarly, if the chart indicates a wind drift of 2 inches at 100 yards with a 10 mph crosswind, you would need to adjust your aim 2 inches into the wind to compensate.
Different Types of 12 Gauge Slugs and Their Trajectories
The type of 12 gauge slug you use will significantly impact its trajectory. There are several types of slugs commonly available, each with its own ballistic characteristics:
- Foster Slugs: These are traditional rifled slugs designed for smoothbore barrels. They are relatively inexpensive but have lower ballistic coefficients and shorter effective ranges. The 12 gauge slug trajectory chart for a Foster slug will show a more pronounced drop compared to other types.
- Brenneke Slugs: Similar to Foster slugs but often made with harder lead alloys and featuring improved designs for better accuracy. They generally have a slightly flatter trajectory than Foster slugs.
- Saboted Slugs: These slugs are smaller-diameter projectiles encased in a plastic sabot that separates from the slug upon exiting the barrel. They are designed for use in rifled barrels and offer significantly improved accuracy and flatter trajectories. A 12 gauge slug trajectory chart for a saboted slug will typically show less drop and wind drift than charts for Foster or Brenneke slugs.
- Full Bore Slugs: Designed to engage the rifling of a rifled shotgun barrel for enhanced accuracy and stability. These slugs often have a higher ballistic coefficient than traditional Foster-type slugs.
Creating Your Own 12 Gauge Slug Trajectory Chart
While pre-made 12 gauge slug trajectory charts are readily available, creating your own tailored chart can be beneficial. This allows you to account for the specific slug you are using, your firearm, and your local environmental conditions. Here’s how you can create your own chart:
- Gather Data: You’ll need to know the slug’s weight, ballistic coefficient (BC), and initial velocity. The BC can often be found on the manufacturer’s website or in reloading manuals. Initial velocity can be measured using a chronograph.
- Use a Ballistic Calculator: Several free online ballistic calculators are available that can generate a trajectory chart based on the data you provide. Input the slug’s weight, BC, initial velocity, sight height, and environmental conditions (temperature, pressure, humidity, wind speed).
- Verify with Real-World Testing: After generating the chart, it’s essential to verify its accuracy by shooting at known distances. Set up targets at various ranges (e.g., 25, 50, 75, 100 yards) and record your actual point of impact. Compare your results to the chart and make any necessary adjustments.
Practical Applications of a 12 Gauge Slug Trajectory Chart
Understanding and utilizing a 12 gauge slug trajectory chart has numerous practical applications for shooters:
- Improved Accuracy: By knowing the amount of drop at different distances, you can accurately compensate and improve your shot placement.
- Ethical Hunting: Accurate shot placement is crucial for ethical hunting. A 12 gauge slug trajectory chart helps you make informed decisions about your maximum effective range and ensure a clean kill.
- Competitive Shooting: In competitive shooting events, precise accuracy is paramount. A trajectory chart can give you a competitive edge by allowing you to predict and account for bullet drop and wind drift.
- Sight Adjustments: The chart can assist in zeroing your scope or sights at a specific distance, ensuring that your point of aim matches your point of impact.
- Understanding Ammunition Performance: By comparing trajectory charts for different types of 12 gauge slugs, you can make informed decisions about which ammunition is best suited for your specific needs and shooting conditions.
Common Mistakes When Using 12 Gauge Slug Trajectory Charts
While 12 gauge slug trajectory charts are valuable tools, it’s important to avoid common mistakes that can lead to inaccurate results:
- Using Incorrect Data: Ensure that you are using accurate data for the slug’s weight, BC, and initial velocity. Using incorrect data will result in an inaccurate chart.
- Ignoring Environmental Conditions: Environmental factors such as temperature, pressure, and wind speed can significantly impact trajectory. Neglecting these factors can lead to errors in your calculations.
- Failing to Verify: Always verify the accuracy of your chart by shooting at known distances. Real-world testing is essential for ensuring that the chart is accurate for your specific firearm and ammunition.
- Overestimating Effective Range: Just because a chart provides data out to a certain distance doesn’t mean you should take shots at those ranges. Consider your skill level, the target size, and the ethical implications before taking a shot at extended ranges.
Conclusion
The 12 gauge slug trajectory chart is an indispensable tool for anyone who shoots 12 gauge slugs, whether for hunting, competition, or recreational purposes. By understanding the factors that influence trajectory, learning how to read and interpret charts, and verifying your results with real-world testing, you can significantly improve your accuracy and shooting proficiency. Remember to always prioritize safety and ethical hunting practices when using firearms. A detailed understanding of the 12 gauge slug trajectory will certainly make you a more accurate and responsible shooter. Use the 12 gauge slug trajectory chart to its fullest potential, and you will see noticeable improvements in your shot placement. Always remember to consider all variables that can affect the 12 gauge slug trajectory, and happy shooting!
[See also: Shotgun Ballistics Explained]
[See also: Choosing the Right 12 Gauge Slug]
[See also: Improving Shotgun Accuracy]
