How to Fix a Leaking Sink in Your Kitchen: A Comprehensive Guide
A leaking sink kitchen is more than just an annoyance; it can lead to wasted water, higher utility bills, and even potential water damage to your cabinets and flooring. Addressing the issue promptly is crucial to prevent further complications. This comprehensive guide provides a step-by-step approach to diagnosing and fixing common leaking sink kitchen problems, empowering you to tackle the repairs yourself. We’ll cover everything from identifying the source of the leak to the tools you’ll need and the specific steps to take for various types of leaks. With a bit of patience and the right information, you can save money and avoid the hassle of calling a plumber.
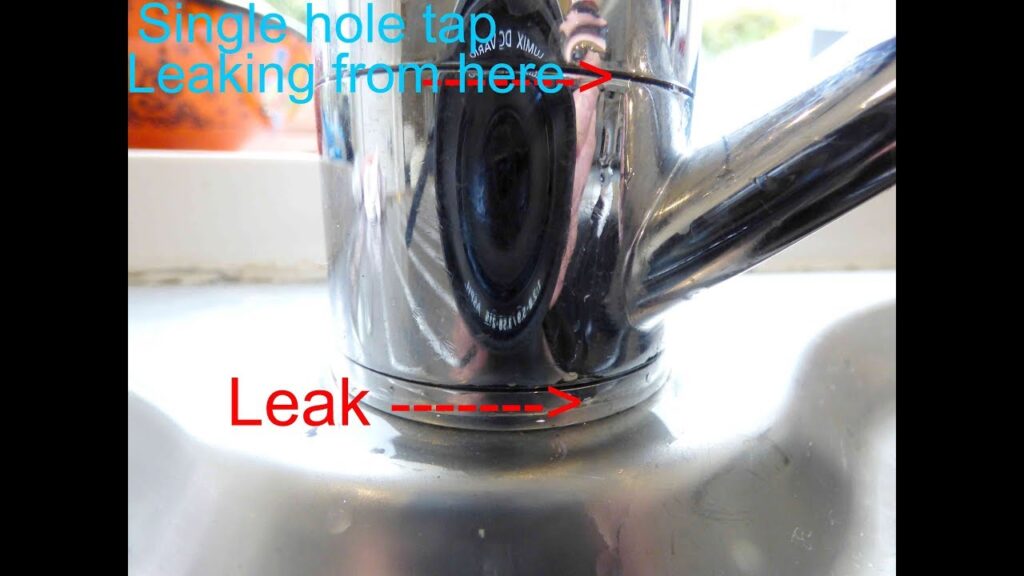
Understanding Common Causes of a Leaking Sink
Before you grab your tools, it’s essential to understand the potential culprits behind a leaking sink kitchen. Pinpointing the source of the leak will make the repair process much smoother and more efficient. Here are some of the most common causes:
- Faulty Faucet O-Rings and Washers: These small rubber or plastic components create a watertight seal within the faucet. Over time, they can wear out, crack, or become brittle, leading to leaks around the faucet handle or spout.
- Loose Connections: The pipes connecting to your faucet and drain assembly can loosen over time due to vibrations or temperature changes. This can cause leaks at the joints.
- Corroded or Damaged Pipes: Older pipes, especially those made of galvanized steel, are susceptible to corrosion, which can create pinhole leaks. Physical damage to the pipes can also lead to leaks.
- Worn-Out Supply Lines: Supply lines connect the water supply to your faucet. These lines can deteriorate over time, leading to leaks.
- Problems with the Drain Assembly: Leaks can occur around the drain flange (the part that sits inside the sink), the drain pipes (P-trap and tailpiece), or the garbage disposal (if you have one).
Gathering Your Tools and Materials
Having the right tools and materials on hand will make the repair process much easier and prevent unnecessary trips to the hardware store. Here’s a list of essential items:
- Basin Wrench: Used to loosen and tighten nuts in tight spaces, especially under the sink.
- Adjustable Wrench: A versatile tool for loosening and tightening various nuts and bolts.
- Pliers: Useful for gripping and manipulating small parts.
- Screwdrivers (Phillips and Flathead): Needed for removing faucet handles and other components.
- Plumber’s Tape (Teflon Tape): Used to seal threaded connections.
- Plumber’s Putty: Used to create a watertight seal around the drain flange.
- Bucket: To catch water and prevent spills.
- Towels or Rags: For cleaning up spills and drying parts.
- Replacement Parts: O-rings, washers, supply lines, drain pipes, etc., as needed.
- Penetrating Oil (Optional): To loosen stubborn nuts and bolts.
Step-by-Step Guide to Fixing Common Leaks
Now that you understand the potential causes and have your tools ready, let’s dive into the specific steps for fixing common leaking sink kitchen issues.
Fixing a Leaky Faucet Spout
A dripping faucet spout is often caused by worn-out O-rings or washers. Here’s how to fix it:
- Turn off the Water Supply: Locate the shut-off valves under the sink and turn them clockwise to shut off the water supply to the faucet.
- Disassemble the Faucet: Refer to your faucet’s manufacturer’s instructions for specific disassembly steps. Generally, you’ll need to remove the faucet handle(s) and then the spout.
- Inspect and Replace O-Rings and Washers: Examine the O-rings and washers for signs of wear or damage. Replace them with new ones of the same size and type.
- Reassemble the Faucet: Follow the disassembly steps in reverse to reassemble the faucet.
- Turn on the Water Supply: Slowly turn the shut-off valves counterclockwise to turn on the water supply. Check for leaks around the spout.
Tightening Loose Connections
Leaks around the base of the faucet or at pipe connections are often due to loose connections.
- Turn off the Water Supply: As before, shut off the water supply to the faucet.
- Inspect Connections: Carefully examine all connections under the sink, including those at the faucet base, supply lines, and drain pipes.
- Tighten Loose Nuts: Use an adjustable wrench to gently tighten any loose nuts. Be careful not to overtighten, as this can damage the pipes or fittings.
- Check for Leaks: Turn on the water supply and check for leaks. If the leak persists, you may need to disassemble the connection and apply plumber’s tape.
Sealing Leaks in the Drain Assembly
Leaks in the drain assembly can occur at the drain flange, P-trap, or tailpiece.
- Turn off the Water Supply: Shut off the water supply.
- Disassemble the Drain Assembly: Carefully disassemble the drain assembly, starting with the P-trap. Place a bucket underneath to catch any water.
- Inspect the Drain Flange: Examine the drain flange for cracks or damage. If it’s damaged, replace it.
- Apply Plumber’s Putty: If the drain flange is in good condition, remove any old plumber’s putty and apply a fresh layer around the underside of the flange.
- Reassemble the Drain Assembly: Reassemble the drain assembly, ensuring that all connections are tight.
- Check for Leaks: Turn on the water supply and check for leaks.
Replacing Worn-Out Supply Lines
If your supply lines are leaking or showing signs of wear, it’s best to replace them.
- Turn off the Water Supply: Shut off the water supply.
- Disconnect the Old Supply Lines: Use an adjustable wrench to disconnect the old supply lines from the faucet and the shut-off valves.
- Install the New Supply Lines: Connect the new supply lines to the faucet and the shut-off valves, ensuring that the connections are tight.
- Check for Leaks: Turn on the water supply and check for leaks.
When to Call a Plumber
While many leaking sink kitchen problems can be fixed with DIY methods, there are situations where it’s best to call a professional plumber. Consider calling a plumber if:
- You’re uncomfortable working with plumbing.
- You can’t identify the source of the leak.
- The leak is severe or causing significant water damage.
- You encounter problems that are beyond your skill level.
- You suspect there may be underlying plumbing issues.
Preventing Future Leaks
Taking preventative measures can help you avoid future leaking sink kitchen problems. Here are some tips:
- Regularly Inspect Your Plumbing: Check your pipes and connections for signs of leaks or corrosion.
- Tighten Loose Connections: Periodically tighten any loose nuts or bolts.
- Replace Worn-Out Parts: Replace O-rings, washers, and supply lines as needed.
- Avoid Over-Tightening: Overtightening connections can damage pipes and fittings.
- Use Quality Plumbing Materials: When replacing parts, choose high-quality materials that are designed to last.
Conclusion
A leaking sink kitchen doesn’t have to be a major headache. By understanding the common causes, gathering the right tools, and following the step-by-step instructions in this guide, you can often fix the problem yourself. Remember to prioritize safety by turning off the water supply before starting any repairs. If you’re unsure about any aspect of the repair, don’t hesitate to call a professional plumber. By taking proactive steps to maintain your plumbing, you can prevent future leaks and keep your kitchen in top condition. Addressing a leaking sink kitchen promptly not only saves water and money but also prevents potential damage to your home. So, roll up your sleeves, grab your tools, and get ready to tackle that leak! [See also: Choosing the Right Kitchen Faucet] [See also: How to Install a Kitchen Sink] [See also: Maintaining Your Kitchen Plumbing System]
