How to Fix a Leaky Pipe Under the Sink: A Comprehensive Guide
Discovering a leaky pipe under the sink can be a homeowner’s nightmare. The constant drip, drip, drip not only wastes water but can also lead to significant water damage, mold growth, and costly repairs if left unattended. Fortunately, fixing a leaky pipe under the sink is often a manageable DIY project, provided you have the right tools, knowledge, and a bit of patience. This comprehensive guide will walk you through the steps to identify the source of the leak and provide practical solutions to resolve it efficiently and effectively.
Understanding the Anatomy of Your Under-Sink Plumbing
Before diving into the repair process, it’s crucial to understand the common components of your under-sink plumbing. Familiarizing yourself with these parts will help you pinpoint the source of the leaky pipe under the sink more accurately. Common components include:
- Supply Lines: These flexible tubes connect the shut-off valves to the faucet. They carry hot and cold water.
- Shut-Off Valves: These valves control the water flow to the faucet. Turning them off is the first step in any plumbing repair.
- P-Trap: This U-shaped pipe traps debris and prevents sewer gases from entering your home.
- Drainpipe: The pipe that carries wastewater away from the sink.
- Tailpiece: The section of pipe that connects the sink drain to the P-trap.
Identifying the Source of the Leak
The first step in fixing a leaky pipe under the sink is accurately identifying the source of the leak. This can save you time and effort by focusing your repair efforts on the specific problem area. Here’s how to locate the leak:
- Dry the Area: Use a clean cloth or paper towels to thoroughly dry all the pipes and connections under the sink. This will make it easier to spot the exact point where the water is leaking.
- Observe Carefully: Turn on the faucet and carefully observe each connection and pipe. Look for drips or moisture forming on any of the components mentioned above.
- Check the Supply Lines: Inspect the supply lines for any signs of cracks, kinks, or corrosion. Pay close attention to the connections at the shut-off valves and the faucet.
- Examine the P-Trap: Check the P-trap for leaks, especially at the joints where it connects to the tailpiece and the drainpipe.
- Feel for Moisture: If you can’t see the leak, run your fingers along the pipes and connections to feel for any moisture.
Tools and Materials You’ll Need
Once you’ve identified the source of the leaky pipe under the sink, gather the necessary tools and materials. Having everything on hand will make the repair process smoother and more efficient. Here’s a list of essential items:
- Adjustable Wrench: For tightening and loosening nuts and connections.
- Basin Wrench: A specialized wrench for reaching tight spaces under the sink.
- Plumber’s Tape (Teflon Tape): For sealing threaded connections.
- Plumber’s Putty: For sealing drains and other fittings.
- Bucket or Container: To catch any water that may drip during the repair.
- Clean Cloths or Paper Towels: For drying and cleaning.
- Replacement Parts (if needed): Such as supply lines, P-trap components, or washers.
- Gloves: To protect your hands.
- Safety Glasses: To protect your eyes from debris.
Step-by-Step Guide to Fixing Common Leaks
Now that you’ve identified the leak and gathered your tools, let’s walk through the steps to fix some common leaky pipe under the sink scenarios:
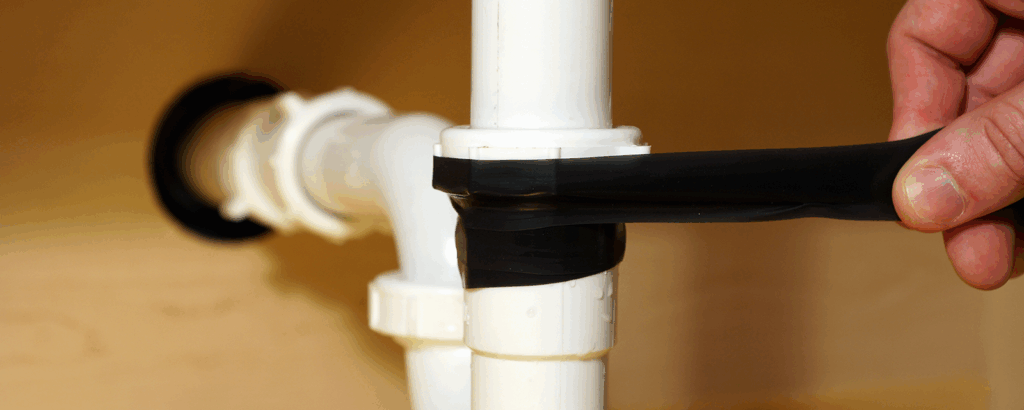
Tightening Loose Connections
Often, a leaky pipe under the sink is simply due to a loose connection. Here’s how to tighten it:
- Turn Off the Water: Shut off the water supply to the faucet by turning the shut-off valves clockwise.
- Position a Bucket: Place a bucket under the leaking connection to catch any remaining water.
- Tighten the Nut: Use an adjustable wrench to gently tighten the nut connecting the leaking pipe. Be careful not to overtighten, as this can damage the pipe or fitting.
- Test for Leaks: Turn the water back on slowly and check for any leaks. If the leak persists, proceed to the next step.
Replacing a Washer or O-Ring
If tightening the connection doesn’t stop the leak, the washer or O-ring may be worn out or damaged. Here’s how to replace it:
- Turn Off the Water: Shut off the water supply to the faucet.
- Disconnect the Pipe: Use an adjustable wrench to carefully disconnect the pipe at the leaking connection.
- Remove the Old Washer or O-Ring: Inspect the connection for a washer or O-ring. If present, remove it using a small tool or your fingers.
- Install a New Washer or O-Ring: Place a new washer or O-ring of the correct size and type onto the connection.
- Reconnect the Pipe: Carefully reconnect the pipe, ensuring the connection is snug but not overtightened.
- Test for Leaks: Turn the water back on slowly and check for any leaks.
Repairing a Leaky P-Trap
A leaky pipe under the sink can often originate from the P-trap. Here’s how to address leaks in this area:
- Turn Off the Water: Though not directly connected to the water supply, turning off the water prevents accidental spills.
- Loosen the Slip Nuts: Use an adjustable wrench to loosen the slip nuts that connect the P-trap to the tailpiece and the drainpipe.
- Remove the P-Trap: Carefully remove the P-trap, being prepared for some water to spill out.
- Inspect the P-Trap: Check the P-trap for cracks or damage. If it’s damaged, replace the entire P-trap assembly.
- Clean the Connections: Clean the threads of the tailpiece and drainpipe to ensure a good seal.
- Reassemble the P-Trap: Reassemble the P-trap, making sure the slip nuts are snug but not overtightened.
- Test for Leaks: Run water down the drain and check for any leaks around the P-trap connections.
Addressing Leaks in Supply Lines
Leaky supply lines can also cause problems. Here’s how to handle them:
- Turn Off the Water: Shut off the water supply to the faucet.
- Disconnect the Supply Line: Use an adjustable wrench to disconnect the supply line at both ends (the shut-off valve and the faucet).
- Inspect the Supply Line: Check the supply line for cracks, kinks, or corrosion. If it’s damaged, replace the entire supply line.
- Install a New Supply Line: Install a new supply line of the correct length and type. Make sure the connections are tight but not overtightened.
- Test for Leaks: Turn the water back on slowly and check for any leaks at the connections.
Preventing Future Leaks
Prevention is always better than cure. Here are some tips to prevent future leaky pipe under the sink:
- Regular Inspections: Periodically inspect the pipes and connections under your sink for any signs of leaks or corrosion.
- Avoid Over-Tightening: When tightening connections, avoid over-tightening, as this can damage the pipes and fittings.
- Use Quality Parts: When replacing parts, use high-quality components that are designed to last.
- Don’t Overload the Sink: Avoid overloading the sink with heavy items, as this can put stress on the drainpipes.
- Be Mindful of What Goes Down the Drain: Avoid pouring grease, oil, or other substances down the drain, as this can clog the pipes and lead to leaks.
When to Call a Professional Plumber
While many leaky pipe under the sink issues can be resolved with DIY methods, there are times when it’s best to call a professional plumber. Consider seeking professional help if:
- You’re uncomfortable working with plumbing.
- You can’t identify the source of the leak.
- The leak is severe or causing significant water damage.
- You suspect there may be underlying plumbing issues.
- You’ve tried DIY methods and the leak persists.
A professional plumber has the expertise and tools to diagnose and repair complex plumbing problems, ensuring the job is done correctly and safely. They can also provide valuable advice on preventing future issues. [See also: Choosing the Right Plumber for Your Needs]
Conclusion
Fixing a leaky pipe under the sink is a common home repair that can be tackled with the right knowledge and tools. By following the steps outlined in this guide, you can identify the source of the leak, implement effective solutions, and prevent future problems. Remember to prioritize safety and don’t hesitate to call a professional plumber if you’re unsure about any aspect of the repair process. By taking proactive measures, you can protect your home from water damage and save money on costly repairs. Addressing a leaky pipe under the sink promptly is crucial for maintaining a healthy and functional plumbing system and prevents further damage. The leaky pipe under the sink can be a minor inconvenience or a sign of a larger plumbing issue, so diligent checks are necessary. Always remember safety precautions when dealing with plumbing repairs to avoid any accidents while fixing the leaky pipe under the sink. A leaky pipe under the sink is a common problem that many homeowners face. Knowing how to fix a leaky pipe under the sink can save you money on plumber bills. Identifying the type of leaky pipe under the sink is crucial for a successful repair. Regular maintenance can prevent a leaky pipe under the sink from occurring. Ignoring a leaky pipe under the sink can lead to significant water damage. When addressing a leaky pipe under the sink, always turn off the water supply. If unsure, always seek professional help for a leaky pipe under the sink. A leaky pipe under the sink should be addressed promptly to prevent further issues.
