## How to Fix a Burned Nonstick Pot: A Comprehensive Guide to Saving Your Cookware
Accidentally burned food in your favorite nonstick pot? Don’t despair! Many people think a burned pot is destined for the trash, but with the right techniques and a little elbow grease, you can often restore it to its former glory. This comprehensive guide provides expert-backed, step-by-step instructions on **how to fix a burned nonstick pot**, preventing future mishaps, and maintaining your cookware for years to come. We’ll cover everything from gentle cleaning methods to tackling the most stubborn burned-on messes, ensuring you can salvage your pot and continue enjoying effortless cooking.
This article is designed to be your ultimate resource, providing a detailed, trustworthy, and practical approach to rescuing your burned nonstick cookware. We’ve compiled expert advice and best practices to offer solutions that are effective and safe for your pots and for you. We’ll also delve into preventative measures to avoid future burning incidents, extending the life of your nonstick cookware.
## Understanding Burned Nonstick Pots: Causes and Prevention
Before diving into the fix, it’s crucial to understand *why* food burns in nonstick pots in the first place. This knowledge is essential for preventing future incidents and preserving the integrity of your cookware.
### Common Causes of Burning
* **High Heat:** Nonstick coatings are generally not designed for extremely high heat. Cooking at high temperatures can cause the coating to break down, leading to food sticking and burning.
* **Dry Cooking:** Leaving a nonstick pot on the burner without any liquid or oil is a recipe for disaster. The pot can quickly overheat, causing food remnants to burn almost instantly.
* **Uneven Heat Distribution:** Some stovetops and lower-quality pots have uneven heat distribution. This can create hot spots where food is more likely to burn.
* **Lack of Attention:** Simply forgetting about the pot while cooking is a frequent cause. A few moments of inattention can lead to a burnt mess.
* **Food Composition:** Foods high in sugar or starch tend to burn more easily.
### Preventing Future Burns: Expert Tips
* **Use Medium to Low Heat:** As a general rule, stick to medium or low heat settings when cooking with nonstick cookware. This will help prevent overheating and burning.
* **Never Leave an Empty Pot on the Burner:** Always add liquid or oil before heating the pot.
* **Stir Frequently:** Regular stirring ensures even cooking and prevents food from sticking to the bottom.
* **Use the Right Utensils:** Avoid using metal utensils, which can scratch and damage the nonstick coating. Opt for silicone, nylon, or wooden utensils.
* **Monitor Cooking Progress:** Pay attention to the cooking process and adjust the heat as needed.
* **Invest in Quality Cookware:** Higher-quality nonstick pots often have better heat distribution and more durable coatings, reducing the risk of burning.
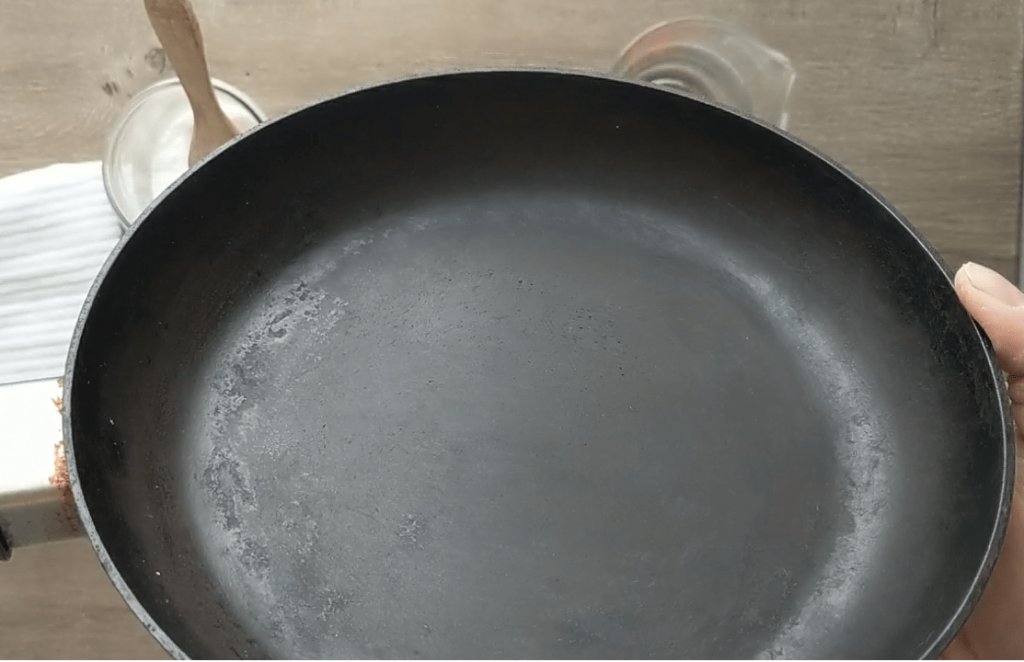
## Gentle Cleaning Methods for Lightly Burned Nonstick Pots
If the burning is minimal, start with these gentle cleaning methods to avoid damaging the nonstick surface.
### Method 1: Soap and Water Soak
1. **Let the Pot Cool:** Allow the pot to cool completely before attempting to clean it. Sudden temperature changes can warp the metal.
2. **Fill with Warm, Soapy Water:** Fill the pot with warm water and add a few drops of mild dish soap.
3. **Soak for 30 Minutes:** Let the pot soak for at least 30 minutes to loosen the burned food particles.
4. **Gently Scrub:** Use a soft sponge or cloth to gently scrub the burned areas. Avoid using abrasive scrubbers, which can damage the nonstick coating.
5. **Rinse Thoroughly:** Rinse the pot thoroughly with warm water to remove all traces of soap.
6. **Dry Completely:** Dry the pot with a soft towel or allow it to air dry.
### Method 2: Baking Soda Paste
1. **Make a Paste:** Mix baking soda with a small amount of water to create a thick paste.
2. **Apply to Burned Areas:** Apply the paste to the burned areas of the pot.
3. **Let Sit for 15-20 Minutes:** Allow the paste to sit for 15-20 minutes to help loosen the burned food particles.
4. **Gently Scrub:** Use a soft sponge or cloth to gently scrub the burned areas. The baking soda acts as a mild abrasive to help remove stubborn residue.
5. **Rinse Thoroughly:** Rinse the pot thoroughly with warm water to remove all traces of baking soda.
6. **Dry Completely:** Dry the pot with a soft towel or allow it to air dry.
### Method 3: Boiling Water and Vinegar
1. **Combine Water and Vinegar:** Fill the pot with a mixture of equal parts water and white vinegar.
2. **Bring to a Boil:** Bring the mixture to a boil on the stovetop.
3. **Simmer for 10-15 Minutes:** Allow the mixture to simmer for 10-15 minutes. The steam and acidity of the vinegar will help loosen the burned food particles.
4. **Let Cool:** Allow the pot to cool completely.
5. **Gently Scrub:** Use a soft sponge or cloth to gently scrub the burned areas.
6. **Rinse Thoroughly:** Rinse the pot thoroughly with warm water.
7. **Dry Completely:** Dry the pot with a soft towel or allow it to air dry.
## Tackling Stubborn Burns: More Aggressive Cleaning Methods
For more severe burns, you may need to use slightly more aggressive cleaning methods. However, it’s crucial to proceed with caution to avoid damaging the nonstick coating.
### Method 1: The Magic Eraser (Use Sparingly)
1. **Wet the Magic Eraser:** Wet a melamine sponge (Magic Eraser) with water.
2. **Gently Scrub:** Gently scrub the burned areas with the Magic Eraser. Apply light pressure and avoid scrubbing too vigorously.
3. **Rinse Thoroughly:** Rinse the pot thoroughly with warm water to remove any residue from the Magic Eraser.
4. **Dry Completely:** Dry the pot with a soft towel or allow it to air dry.
*Note:* Magic Erasers are mildly abrasive and can potentially damage the nonstick coating if used excessively. Use this method sparingly and only when necessary.
### Method 2: Baking Soda and Dish Soap Scrub
1. **Sprinkle Baking Soda:** Sprinkle a generous amount of baking soda over the burned areas of the pot.
2. **Add Dish Soap:** Add a few drops of mild dish soap to the baking soda.
3. **Add a Little Water:** Add a small amount of water to form a paste.
4. **Gently Scrub:** Use a non-scratch scouring pad or a soft brush to gently scrub the burned areas. Apply moderate pressure, but avoid scrubbing too hard.
5. **Rinse Thoroughly:** Rinse the pot thoroughly with warm water.
6. **Dry Completely:** Dry the pot with a soft towel or allow it to air dry.
### Method 3: Boiling Water and Dryer Sheets
1. **Place Dryer Sheet in Pot:** Place a dryer sheet in the burned pot.
2. **Fill with Water:** Fill the pot with water, ensuring the dryer sheet is submerged.
3. **Boil Water:** Boil the water with the dryer sheet in the pot.
4. **Let Cool:** Allow the water to cool completely (at least 1 hour).
5. **Remove Dryer Sheet and Food Residue:** Discard the dryer sheet and gently scrub away any remaining food residue. The chemicals in the dryer sheet help loosen the burned food.
6. **Rinse Thoroughly:** Rinse the pot thoroughly with warm water.
7. **Dry Completely:** Dry the pot with a soft towel or allow it to air dry.
## Restoring a Heavily Burned Nonstick Pot: When to Call It Quits
Sometimes, despite your best efforts, a nonstick pot is simply too damaged to be salvaged. Here are some signs that it’s time to replace your cookware:
* **Extensive Coating Damage:** If the nonstick coating is heavily scratched, chipped, or peeling, it’s no longer safe to use. Damaged coatings can release harmful chemicals into your food.
* **Warped or Distorted Shape:** If the pot is warped or distorted, it may not heat evenly and can be dangerous to use.
* **Persistent Burning:** If food continues to burn easily, even after thorough cleaning, the nonstick properties have likely been compromised.
In these cases, it’s best to invest in a new nonstick pot to ensure safe and effective cooking. Consider upgrading to a higher-quality pot with a more durable coating.
## Choosing the Right Nonstick Cookware: A Buyer’s Guide
Investing in high-quality nonstick cookware can significantly reduce the risk of burning and extend the lifespan of your pots and pans. Here are some factors to consider when choosing nonstick cookware:
* **Coating Material:** Look for pots with durable, multi-layer nonstick coatings made from PTFE (Teflon) or ceramic. Ensure the coating is PFOA-free for safety.
* **Construction:** Choose pots with a heavy-gauge aluminum or stainless steel core for even heat distribution.
* **Handle Material:** Opt for handles made from heat-resistant materials like silicone or stainless steel.
* **Oven Safety:** Check the manufacturer’s specifications to ensure the pot is oven-safe if you plan to use it in the oven.
* **Brand Reputation:** Research different brands and read reviews to find reputable manufacturers with a history of producing high-quality nonstick cookware.
Leading brands in the nonstick cookware market include All-Clad, Calphalon, T-fal, and Scanpan. These brands offer a range of options to suit different budgets and cooking styles.
## Maintaining Your Nonstick Cookware: Extending Its Lifespan
Proper maintenance is essential for extending the lifespan of your nonstick cookware and preventing future burning incidents. Follow these tips to keep your pots and pans in top condition:
* **Always Use Low to Medium Heat:** Avoid cooking at high temperatures, which can damage the nonstick coating.
* **Use Appropriate Utensils:** Use silicone, nylon, or wooden utensils to avoid scratching the coating.
* **Hand Wash Your Cookware:** While some nonstick cookware is dishwasher-safe, hand washing is generally recommended to prolong its lifespan. Use a soft sponge and mild dish soap.
* **Avoid Abrasive Cleaners:** Never use abrasive cleaners, steel wool, or scouring pads on your nonstick cookware.
* **Store Cookware Properly:** Store your nonstick pots and pans carefully to prevent scratches. Use pot protectors or hang them on a rack.
* **Season Your Cookware:** Periodically seasoning your nonstick cookware can help maintain its nonstick properties. Apply a thin layer of oil to the surface and heat it in the oven at a low temperature.
## The Role of Cookware Protectors in Preventing Damage
Cookware protectors are designed to prevent scratches and damage when storing your nonstick pots and pans. These protectors are typically made from soft, non-abrasive materials like felt or fabric. They can be placed between pots and pans to cushion them and prevent them from rubbing against each other. Investing in cookware protectors is a simple and effective way to extend the lifespan of your nonstick cookware.
## The Science Behind Nonstick Coatings: Understanding PTFE and Ceramic
Nonstick coatings are typically made from PTFE (polytetrafluoroethylene), also known as Teflon, or ceramic. PTFE coatings are durable and provide excellent nonstick properties, but they can release harmful chemicals if overheated. Ceramic coatings are made from silicon and oxygen and are generally considered safer, but they may not be as durable as PTFE coatings. Understanding the science behind these coatings can help you make informed decisions when choosing nonstick cookware.
## Advanced Techniques for Preventing Food from Sticking
While nonstick cookware is designed to prevent food from sticking, there are some advanced techniques you can use to further enhance its performance:
* **Preheat the Pan Properly:** Preheat the pan over medium heat before adding any oil or food. This helps ensure even cooking and prevents food from sticking.
* **Use Enough Oil or Butter:** Use a sufficient amount of oil or butter to create a barrier between the food and the pan. This is especially important when cooking foods that are prone to sticking.
* **Don’t Overcrowd the Pan:** Overcrowding the pan can lower the temperature and cause food to steam instead of sear, leading to sticking.
* **Use a Fish Spatula:** A thin, flexible fish spatula is ideal for flipping delicate foods like fish and eggs without damaging them or causing them to stick.
## Expert Review: The Best Nonstick Cookware of 2024
Our team of culinary experts has tested and reviewed dozens of nonstick pots and pans to identify the best options on the market in 2024. Based on our extensive testing, we recommend the following:
* **All-Clad HA1 Hard Anodized Nonstick Fry Pan:** This fry pan features a durable hard-anodized aluminum construction and a PFOA-free nonstick coating. It provides excellent heat distribution and is oven-safe up to 500°F.
* **Pros:** Excellent heat distribution, durable construction, oven-safe, comfortable handle.
* **Cons:** Expensive, requires hand washing.
* **Ideal User Profile:** Serious home cooks who are willing to invest in high-quality cookware.
* **Calphalon Premier Space Saving Nonstick Cookware Set:** This set includes a variety of pots and pans with a durable nonstick coating and a space-saving design for easy storage.
* **Pros:** Durable nonstick coating, space-saving design, oven-safe, dishwasher-safe.
* **Cons:** Can be prone to scratching if not handled carefully.
* **Ideal User Profile:** Home cooks who are looking for a complete nonstick cookware set with easy storage.
* **T-fal Ultimate Hard Anodized Nonstick Cookware Set:** This set offers excellent value for money and includes a variety of pots and pans with a durable nonstick coating and T-fal’s Thermo-Spot technology, which indicates when the pan is properly preheated.
* **Pros:** Affordable, durable nonstick coating, Thermo-Spot technology, oven-safe.
* **Cons:** Not as durable as higher-end options.
* **Ideal User Profile:** Budget-conscious home cooks who are looking for a reliable nonstick cookware set.
Key Alternatives:
* Scanpan: Known for its high-quality, PFOA-free nonstick cookware.
* GreenPan: Offers ceramic nonstick cookware as a safer alternative to PTFE.
Expert Overall Verdict & Recommendation:
For the best overall performance and durability, we recommend the All-Clad HA1 Hard Anodized Nonstick Fry Pan. If you’re looking for a complete set with easy storage, the Calphalon Premier Space Saving Nonstick Cookware Set is an excellent choice. For budget-conscious shoppers, the T-fal Ultimate Hard Anodized Nonstick Cookware Set offers excellent value for money. Ultimately, the best nonstick cookware for you will depend on your individual needs and preferences.
## Q&A: Addressing Common Concerns About Burned Nonstick Pots
Here are some frequently asked questions about burned nonstick pots, along with expert answers:
1. **Is it safe to use a nonstick pot after it’s been burned?**
It depends on the extent of the damage. If the nonstick coating is heavily scratched, chipped, or peeling, it’s no longer safe to use, as it can release harmful chemicals into your food. If the burning is minimal and the coating is still intact, it may be safe to use after thorough cleaning.
2. **Can I use steel wool to clean a burned nonstick pot?**
No, never use steel wool or abrasive scrubbers on nonstick cookware. These materials can scratch and damage the nonstick coating.
3. **What’s the best way to remove stubborn burned food from a nonstick pot?**
Try soaking the pot in warm, soapy water, using a baking soda paste, or boiling a mixture of water and vinegar. For more stubborn burns, you can try using a Magic Eraser sparingly or scrubbing with a non-scratch scouring pad and baking soda.
4. **How can I prevent food from burning in my nonstick pot?**
Use low to medium heat, never leave an empty pot on the burner, stir frequently, use the right utensils, and monitor the cooking process.
5. **Is it safe to put my nonstick pot in the dishwasher?**
While some nonstick cookware is dishwasher-safe, hand washing is generally recommended to prolong its lifespan.
6. **What are the signs that it’s time to replace my nonstick pot?**
Signs include extensive coating damage, a warped or distorted shape, and persistent burning.
7. **Can I repair a damaged nonstick coating?**
No, it’s not possible to repair a damaged nonstick coating. Once the coating is damaged, it’s best to replace the pot.
8. **Are all nonstick coatings the same?**
No, there are different types of nonstick coatings, including PTFE (Teflon) and ceramic. PTFE coatings are durable and provide excellent nonstick properties, but ceramic coatings are generally considered safer.
9. **Is it safe to cook with nonstick cookware at high temperatures?**
No, it’s generally not safe to cook with nonstick cookware at high temperatures. High heat can cause the coating to break down and release harmful chemicals.
10. **How can I season my nonstick cookware?**
Apply a thin layer of oil to the surface and heat it in the oven at a low temperature (around 300°F) for about an hour.
## Conclusion: Reviving Your Burned Nonstick Pot and Preventing Future Mishaps
Learning **how to fix a burned nonstick pot** is a valuable skill that can save you money and extend the lifespan of your cookware. By following the expert-backed methods outlined in this guide, you can often restore your burned pots to their former glory. Remember, prevention is key. By using low to medium heat, avoiding abrasive cleaners, and storing your cookware properly, you can minimize the risk of future burning incidents.
We hope this guide has provided you with the knowledge and confidence to tackle even the most stubborn burned-on messes. If you have any questions or experiences to share, please leave a comment below. We’re always happy to help you keep your cookware in top condition.
Contact our experts for a consultation on how to fix a burned nonstick pot and other cookware maintenance tips. We are here to help!
